关注职场办公,分享实用干货,洞察科技资讯,这里是「职场科技范」。
很多人都觉得PPT是个正经的办公软件,应该用在年终总结、报表演示等高端场合。
但其实它还是个设计软件,你花几个小时用PS完成的抠图动作,它10秒就能完成。
今天就带大家揭秘PPT的抠图功能,操作简单,一学就会,下面一起来了解下吧!

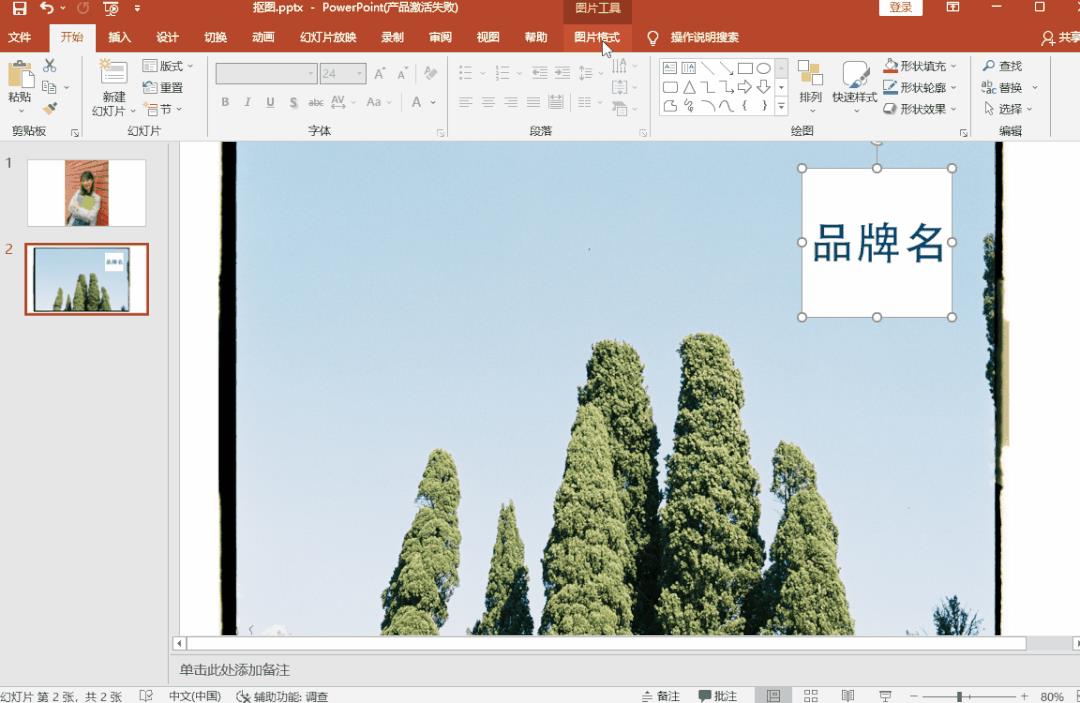
首先我们看到的是一张单纯的logo图片,以它为例:

选中带底色的品牌名,点击「图片格式」-「颜色」-「设置透明色」。
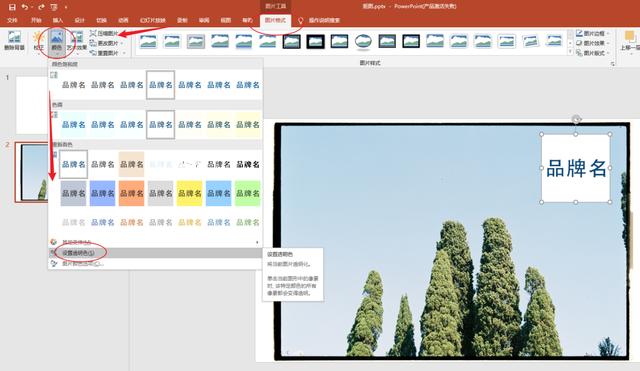
然后把鼠标移动到底色上,轻点一下就能抠出文字,抠图去背景就这样简单!
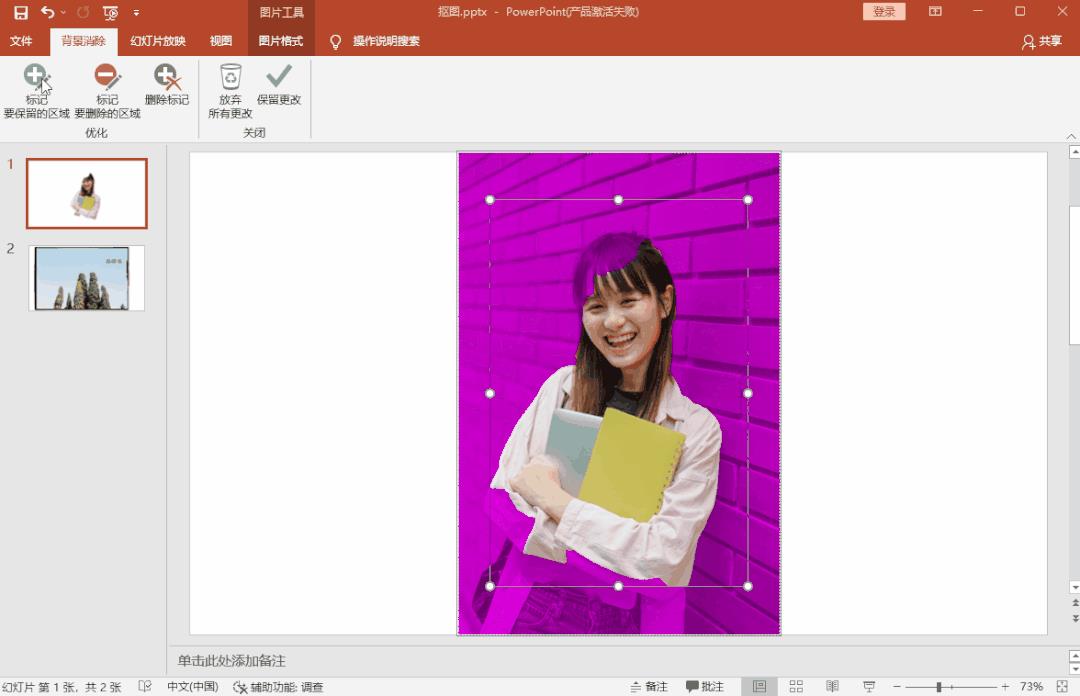
需要去除复杂背景,可以借助「删除背景」功能。同样先选中图片,点击「图片格式」-「删除背景」,被覆盖紫色的就是待删除区。
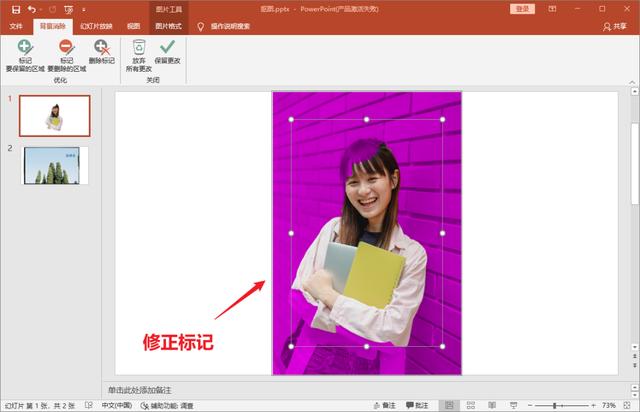
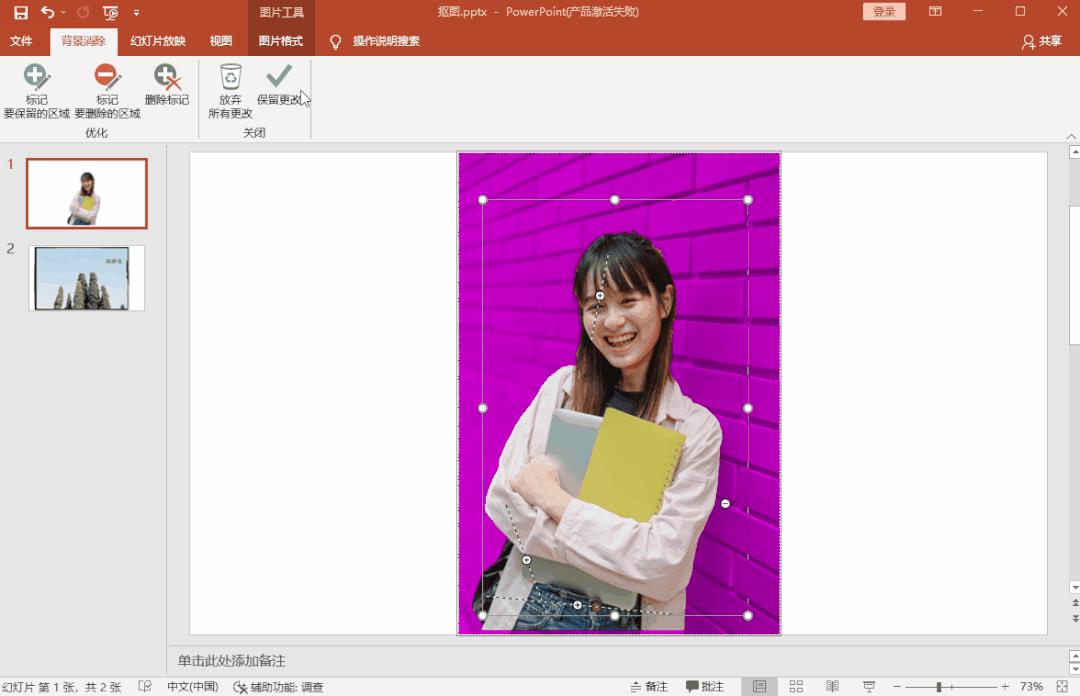
选择「背景消除」下的标记,手动修改保留区和删除区就行。
这样抠图操作就完成了,还能随意更换背景色,素材也可以保存到电脑上。
不过使用PPT的抠图功能,需要2010版本以上的office,如果你用的是更早的版本,可以试试「图片编辑助手」里面的“抠图换背景”功能。
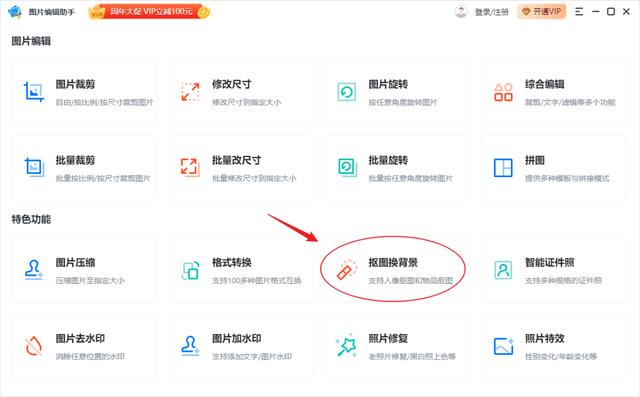
上传图片自动抠图,人像、物品都能抠,生成效果图后,点击「换背景」,一键解锁超多场景。

多张抠图就更省事了,批量添加待处理的图像,一次性可以搞定30张抠图!

不会PS没关系!用PPT也能快速抠图,操作简单,一学就会。对于几十张图片的抠图需求,还是专业工具更省力!
声明:本站所有文章,如无特殊说明或标注,均为本站原创发布。任何个人或组织,在未征得本站同意时,禁止复制、盗用、采集、发布本站内容到任何网站、书籍等各类媒体平台。如若本站内容侵犯了原著者的合法权益,可联系我们进行处理。